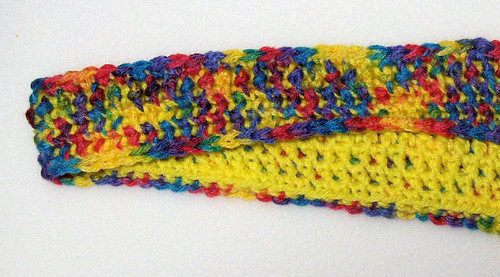
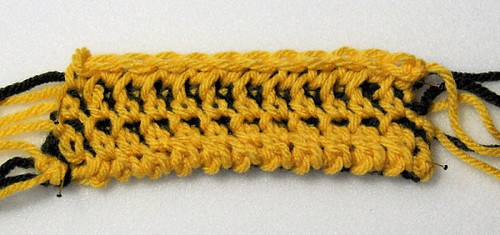
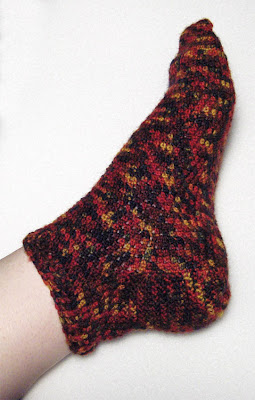
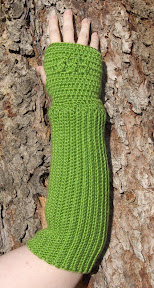
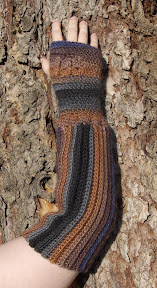
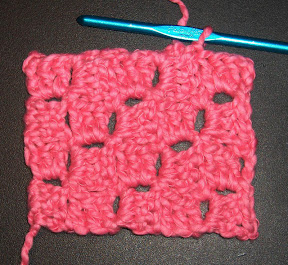
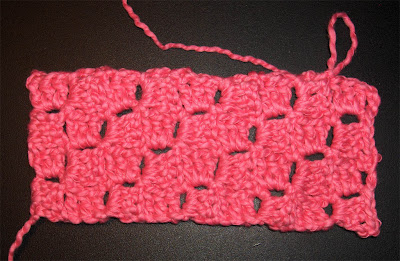
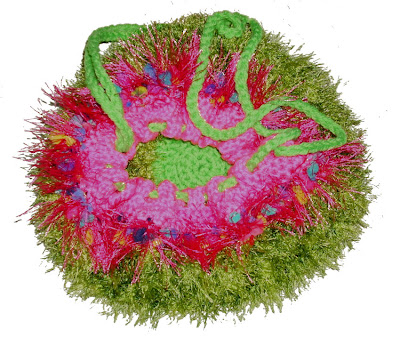
Anyway, when I lived closer to Sandy, UT, I'd pop into Unraveled Sheep quite often and even taught some crochet classes there. Twice I've been asked to decipher "old family patterns" and one was the diagonal box stitch and the other was a double sided crochet design with old terms that the lady who brought it in couldn't decipher.
Showing posts with label crochet. Show all posts
Tuesday, April 10, 2012
Double-Sided Crochet Tutorial
So, I thought I'd posted this here but can't find it anywhere and since I really don't have a lot of posts, it should have been easy to find if it were here.
Thursday, February 02, 2012
Tatting, more Crochet, and a Dr. Who Scarf started
It's been a while, but I've been busy so that's my excuse and I'm sticking with it.
Christmas was very quiet, as usual, with just my sister and the furries. We didn't get a ham this year as we were leaving for Austin three days later and wouldn't be able to finish it in time.
In Austin, we stayed with sister Jenny and her husband Brian and traveled back and forth to San Antonio to attend the Air Force basic training graduation ceremonies. My oldest nephew Clay was our proud Airman. His mother, Darlene was there with her husband Jimmy (who is in the Army) and their other five boys (one is a foster son).

And, of course, we had to get a photo of the proud mom and aunts ...

We spent a week and a half in Austin (saved $180 in airfare that way) and one evening Jenny was showing us her needle tatting. Years ago I'd purchased a learn needle tatting book but never tried it. I had tried shuttle tatting but it never clicked and the way the shuttle had to be used just seemed weird to me. Last Saturday, Jess said she wanted to learn so I bought a few more needles and some thread. Once we got home, I found the book in my library, figured it out and taught Jess. I taught her to knit a few weeks back so we'll see which one she keeps up with. On Sunday, I started tatting a heart that was a free pattern at Hobby Lobby (and is also online at Handy Hands Tatting) and finished it on Tuesday. The picots are too big and one of the side chains has an extra picot, but not too bad for a first try.
I've already started a larger project. It's go big or go home for me when it comes to doing stuff!
My brother-in-law, Brian (Jenny's husband) is a huge Dr. Who fan (well, so is Jenny) and he asked me to make him a Season 16 Scarf. There are several sites with patterns but I settled on the one at the Witty Little Knitter because the yarn selections were all one brand and I could order them online. Another site that is good for patterns is DoctorWhoScarf.com.
So far I have 190 rows completed but the pic below shows it after about 130 rows or so.

I used the Scarf-o-matic to calculate how much I have completed and, since it's too long to put here, I've added it to the header of my blog instead.
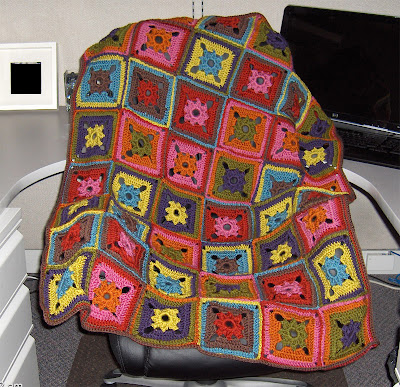
In other news, I finished an afghan design that I'm really proud of. I started it before Christmas, worked on it on the plane, in the airport, and while in Austin, then finished it when I got home. The full pattern, with guidelines on making it into a scarf or wrap instead, will be in the next issue of Crochet Uncut.
Christmas was very quiet, as usual, with just my sister and the furries. We didn't get a ham this year as we were leaving for Austin three days later and wouldn't be able to finish it in time.
In Austin, we stayed with sister Jenny and her husband Brian and traveled back and forth to San Antonio to attend the Air Force basic training graduation ceremonies. My oldest nephew Clay was our proud Airman. His mother, Darlene was there with her husband Jimmy (who is in the Army) and their other five boys (one is a foster son).

Airman Jimmy Clay Smith, Jr.
And, of course, we had to get a photo of the proud mom and aunts ...

Jessica, Jenny, Darlene, Darlisa
We spent a week and a half in Austin (saved $180 in airfare that way) and one evening Jenny was showing us her needle tatting. Years ago I'd purchased a learn needle tatting book but never tried it. I had tried shuttle tatting but it never clicked and the way the shuttle had to be used just seemed weird to me. Last Saturday, Jess said she wanted to learn so I bought a few more needles and some thread. Once we got home, I found the book in my library, figured it out and taught Jess. I taught her to knit a few weeks back so we'll see which one she keeps up with. On Sunday, I started tatting a heart that was a free pattern at Hobby Lobby (and is also online at Handy Hands Tatting) and finished it on Tuesday. The picots are too big and one of the side chains has an extra picot, but not too bad for a first try.
I've already started a larger project. It's go big or go home for me when it comes to doing stuff!My brother-in-law, Brian (Jenny's husband) is a huge Dr. Who fan (well, so is Jenny) and he asked me to make him a Season 16 Scarf. There are several sites with patterns but I settled on the one at the Witty Little Knitter because the yarn selections were all one brand and I could order them online. Another site that is good for patterns is DoctorWhoScarf.com.
So far I have 190 rows completed but the pic below shows it after about 130 rows or so.

I used the Scarf-o-matic to calculate how much I have completed and, since it's too long to put here, I've added it to the header of my blog instead.
In other news, I finished an afghan design that I'm really proud of. I started it before Christmas, worked on it on the plane, in the airport, and while in Austin, then finished it when I got home. The full pattern, with guidelines on making it into a scarf or wrap instead, will be in the next issue of Crochet Uncut.
Sunday, March 08, 2009
Mystery Laceweight Shawl CAL
I've joined my first real crochet along at Ravelry, the Mystery Laceweight Shawl CAL '09 by Tracey McCorkle. I'm using the Knit Picks Shadow yarn in Spring Green that I was going to use for the Goddess Knits Anniversary Mystery KAL last year but decided against doing until I'm a more accomplished knitter. I meant to keep track of how long each clue takes me but I forgot for the first clue so I'll need to redo it with some scrap yarn to get the time.
Clue 1 was released on 3/1/09 and here is my completed clue for rounds 1 through 4:

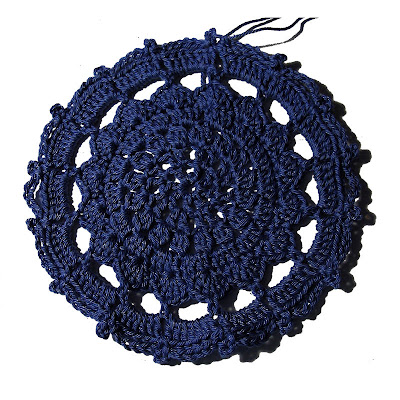
Clue 2 was released on 3/8/09 and it took 45 minutes to complete rounds 5 through 7:

I'm hoping to one day be able to design my own shawl and this is excellent practice, plus, I'll have a gorgeous shawl in my favorite color once it is completed!
Clue 1 was released on 3/1/09 and here is my completed clue for rounds 1 through 4:
Clue 2 was released on 3/8/09 and it took 45 minutes to complete rounds 5 through 7:
I'm hoping to one day be able to design my own shawl and this is excellent practice, plus, I'll have a gorgeous shawl in my favorite color once it is completed!
Monday, October 20, 2008
Fall Socks completed
In between getting Crochet Uncut ready to publish, working part time at WalMart, doing some contract work, and looking for a full time job, I was able to finish another pair of socks using Zitron Trekking Hand Art yarn. I selected the yarn because of the colors but thought it might be too scratchy for socks, but once I started the socks and tried them on, I was pleasantly surprised. The yarn is warm and comfy. I think I have enough left to make a pair of wrist warmers.

Check out my Fall Socks Ravelry project page.
On my lunch hours at WalMart, I'm working on a new project for Crochet Uncut and am hoping to have it completed before it's time to publish the first issue.

Check out my Fall Socks Ravelry project page.
On my lunch hours at WalMart, I'm working on a new project for Crochet Uncut and am hoping to have it completed before it's time to publish the first issue.
Sunday, September 28, 2008
Squid- O-Licious Socks Finished!
I love these socks and the stripes from the yarn! I'm wearing the socks right now and my feet are warm and comfy!! I'm definitely going to buy more of this yarn when I can afford it.

Shorah Y'all! Blogs of Note

Shorah Y'all! Blogs of Note
Saturday, September 27, 2008
Squid-O-Licious Socks & CLF Book
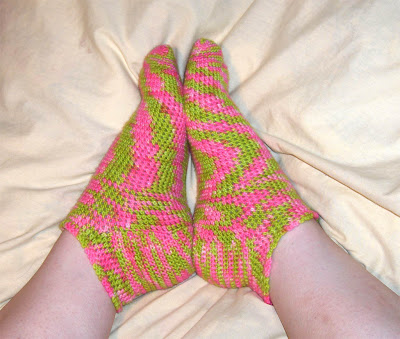
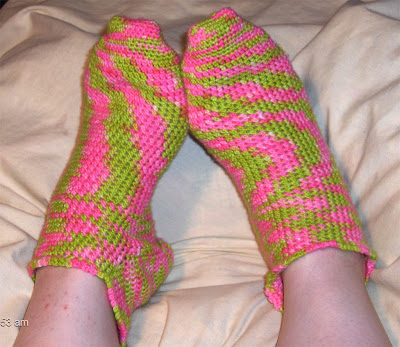
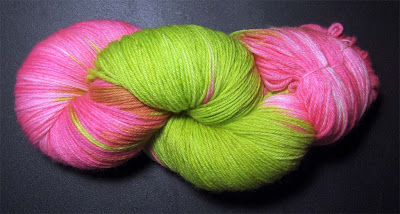
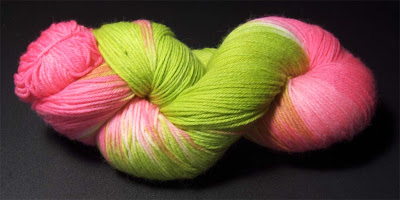
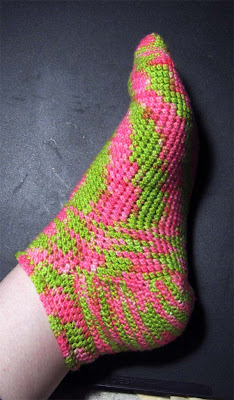
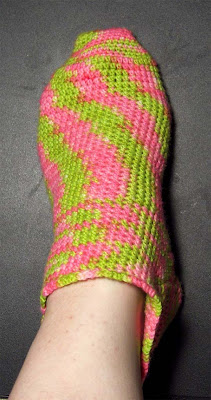
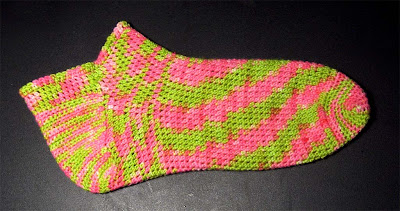
I bought two skeins of sock yarn from AndeyLayne.com in her Squid-O-Licious colorway. The yarn is 75% Merino and 25% Nylon and squishy soft.

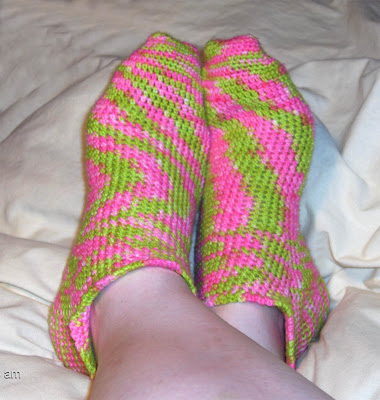
I decided to use one skein to make a pair of arm warmers and the second skein to make a pair of socks. Starting with the socks, I selected the Ultimate Crocheted Socks by Dorothy Hardy. I started out making the large size but they were too large so I frogged the sock and started over making the small size. The instructions have you stop 2.5" from the back of the heel then begin increasing for the gusset however, this made the sock too long and too big. I frogged again until I was 3" from the back of the heel and this time it worked perfectly, well except for doing the heel wrong because I didn't read the pattern erratas in the comments. The cuff is a ribbing but since I wanted a looser cuff, I did a simple ch2, sc in each st around. I'm to the gusset on the second sock and once it is done, I'll have a comfy pair of scrumptious footies. I just love how the pink and lime sections form gorgeous wavy stripes up the foot.


I decided to use one skein to make a pair of arm warmers and the second skein to make a pair of socks. Starting with the socks, I selected the Ultimate Crocheted Socks by Dorothy Hardy. I started out making the large size but they were too large so I frogged the sock and started over making the small size. The instructions have you stop 2.5" from the back of the heel then begin increasing for the gusset however, this made the sock too long and too big. I frogged again until I was 3" from the back of the heel and this time it worked perfectly, well except for doing the heel wrong because I didn't read the pattern erratas in the comments. The cuff is a ribbing but since I wanted a looser cuff, I did a simple ch2, sc in each st around. I'm to the gusset on the second sock and once it is done, I'll have a comfy pair of scrumptious footies. I just love how the pink and lime sections form gorgeous wavy stripes up the foot.


- Ultimate Crocheted Socks Ravelry Page - make sure you read the comments on the actual pattern page about the extra marker in the pattern
- Squid-O-Licious Socks Ravelry Project Page

- Eleanora's Arm Warmers Ravelry Project Page
- Crochet Liberation Front First Ever Book Ravelry Page - page has link to Amazon page so Ravelry gets a bit of cash from the sale
Friday, September 26, 2008
Diagonal Box Stitch (aka Corner-to-Corner)
Someone made a blanket using the Diagonal Box Stitch and brought it into the Unraveled Sheep in Sandy, UT. Several ladies were interested in learning how to do the stitch and so we scheduled a class - but no one signed up. Quite disappointing after all the interest was shown in it.
Anyway, this stitch can be used to make just about anything, from items for the home, such as washcloths, blankies, afghans, and blankets, to clothing items.


Shorah Y'all!
Anyway, this stitch can be used to make just about anything, from items for the home, such as washcloths, blankies, afghans, and blankets, to clothing items.


Shorah Y'all!
Saturday, September 13, 2008
Crochet Uncut - A New E-Zine
I've been working on a new e-zine, called Crochet Uncut, targeted towards crochet articles and patterns and the response on Ravelry has been tremendous! I'm so excited and already have a featured columnist who will be writing patterns specifically for beginners along with a dose of humor. I also have a voluteer editor who will be checking submitted patterns against the submission guidelines and for readability. Several other Ravelry members are also working on patterns to submit for the first issue due out at the beginning of November.
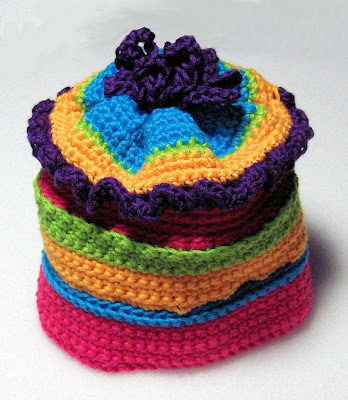
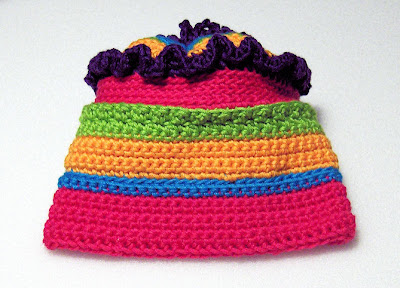
Just to give folks a sneak peak, I designed a childs hat specifically for the first issue and it is adorable, if I say so myself!


The pattern will be released with the first issue of Crochet Uncut, but you can check out the Ravelry pattern page for it and favorite it or queue it up.
Shorah Y'all!
Just to give folks a sneak peak, I designed a childs hat specifically for the first issue and it is adorable, if I say so myself!


The pattern will be released with the first issue of Crochet Uncut, but you can check out the Ravelry pattern page for it and favorite it or queue it up.
Shorah Y'all!
Wednesday, June 11, 2008
Sundress Finished
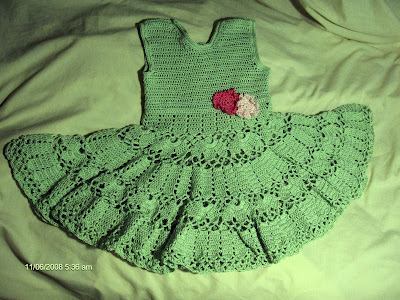
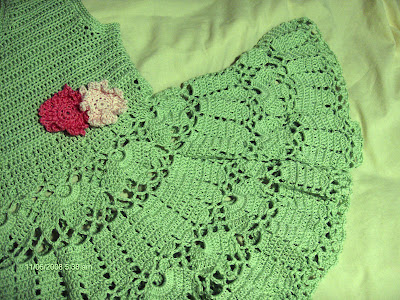
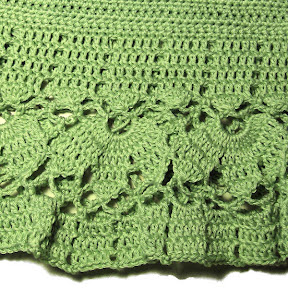
I've been working on a crocheted sundress for my little cousin Anya and finally finished it this morning around 5:30 am when I couldn't sleep and figured what better way to spend a sleepless night than to finish this project?
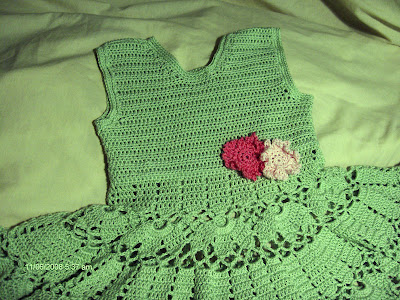
The pattern is by Joyce Nordstrom and is found in Crochet Today! May/June 2008 issue. I did make some changes to the dress, like a third row of scs for the neck and arm edging instead of reverse scs (was taking too long) and added some little crocheted flowers at the waist.
The color is way off in these photos, the dress color is more of a light green. I'll have to take photos outside to get a more realistic color.


oooh, the color is more like this image:

Queue up on Ravelry
Shorah Y'all!
The pattern is by Joyce Nordstrom and is found in Crochet Today! May/June 2008 issue. I did make some changes to the dress, like a third row of scs for the neck and arm edging instead of reverse scs (was taking too long) and added some little crocheted flowers at the waist.
The color is way off in these photos, the dress color is more of a light green. I'll have to take photos outside to get a more realistic color.


oooh, the color is more like this image:

Queue up on Ravelry
Shorah Y'all!
Monday, June 02, 2008
New Crochet/Knit Charting Software in Development
I'm currently starting on the design and development of a crochet/knit charting software program that will include symbol charting and radial designs. I want this program to be something that crocheters and knitters can use so I'm asking for your help in designing the features to be included.
Take my interest survey and then come join my Ravelry group to discuss features and ideas.
Please pass this on to anyone you think would be interested!
Shorah Y'all!
Take my interest survey and then come join my Ravelry group to discuss features and ideas.
Please pass this on to anyone you think would be interested!
Shorah Y'all!
Sunday, May 25, 2008
Purple Haze Arm Warmers
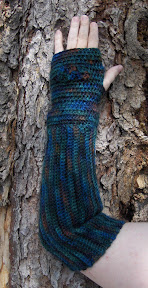
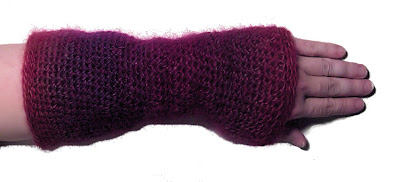
My newest design is a pair of arm warmers that can be made fitted, loose, or very loose. I used Filatura Di Crossa Multicolor for mine but any fine yarn will work, with a larger hook to give a lacy, soft feel to them. The version below is fitted so it won't flop around but I'm working on a much looser version in a lighter yarn for summer wear in the cool evenings.
I have the pattern up for sale at Ravelry for $1.50, a reasonable price, and only because I need some extra cash right now. I hope you enjoy it!

Shorah Y'all!

I have the pattern up for sale at Ravelry for $1.50, a reasonable price, and only because I need some extra cash right now. I hope you enjoy it!
Shorah Y'all!
Saturday, May 24, 2008
Branching Out Scarf
Last night I started on the Branching Out Scarf by Susan Lawrence with the Filatura DiCrossa Multicolor yarn in the Green/Blue/Purple/Pink/Yellow colorway. The photo below is after completing the first 20 rows. The yarn is soft and fluffy and probably not something I should have used for a first lace project. I did have to frog it a few times as I just could not get the stitch count right and kept ending up with too many or too few stitches.
Note to self: Never try to knit by candlelight ...

Queue up on Ravelry
My project on Ravelry
I purchased a purple skein of the same yarn to make the same scarf for my sister, Jessica. She wanted the green one since there was purple in it but I'd already claimed it and Unraveled Sheep only had one skein of each. I'd love to get hold of another skein of the green to make the Silk Sleeves in the One Skein book by Leigh Radford.
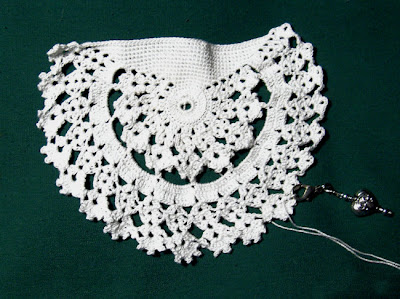
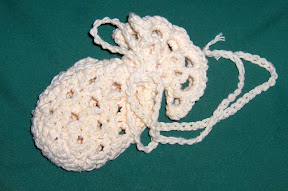
While doing some sorting through stuff the other day, I found a purse crochet project I'd started back in June of 2007. I did most of it while on a plane to Seattle and over the weekend there while at a friend's wedding. I'm almost finished with the front of the purse and the back is almost identical and while the pattern called for size 10 crochet thread, I'm using size 20.
The purse pattern is from Annie's Attic # 87Z30, The International Collection of Crochet Patterns.

(Sigh) The photo isn't very good but I never seem to be able to get a good photo of light/white yarns, even when not using a flash.
Queue up on Ravelry
My project on Ravelry
Shorah Y'all!
Note to self: Never try to knit by candlelight ...

Queue up on Ravelry
My project on Ravelry
I purchased a purple skein of the same yarn to make the same scarf for my sister, Jessica. She wanted the green one since there was purple in it but I'd already claimed it and Unraveled Sheep only had one skein of each. I'd love to get hold of another skein of the green to make the Silk Sleeves in the One Skein book by Leigh Radford.
While doing some sorting through stuff the other day, I found a purse crochet project I'd started back in June of 2007. I did most of it while on a plane to Seattle and over the weekend there while at a friend's wedding. I'm almost finished with the front of the purse and the back is almost identical and while the pattern called for size 10 crochet thread, I'm using size 20.
The purse pattern is from Annie's Attic # 87Z30, The International Collection of Crochet Patterns.

(Sigh) The photo isn't very good but I never seem to be able to get a good photo of light/white yarns, even when not using a flash.
Queue up on Ravelry
My project on Ravelry
Shorah Y'all!
Monday, April 28, 2008
Glamour top and Spirogyra Fingerless Mitts
Two of the many projects I'm working on will probably take me some time to complete.
The first is the Glamour top from Patons using their Grace yarn. I'd started it in Ginger for my sister Jennifer but yesterday found enough of the Azure colorway at Michael's to switch to that color. Especially since she really wanted the blue anyway. I'll save the green for another project for myself.
You can see the top here on the Paton's site: Glamour top - it's the one on the cover of the booklet. The instructions are a bit obtuse on some points so I started a post at Ravelry in the Patons Beehive forum to discuss it.
Since I restarted the top last night, I have one of the sleeve medallions done and about an 1.5" of the back completed.
Here is the back portion:

and the sleeve medallion:

Queue up on Ravelry
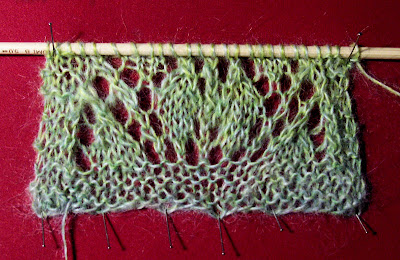
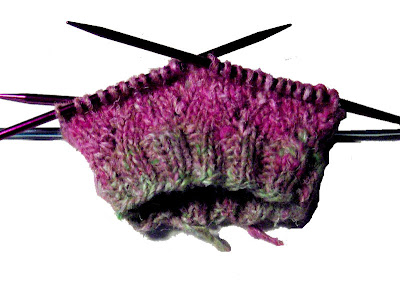
The second project is the Spirogyra Fingerless Mittens by Lynne Vogel, available for free at Knitty.com. I've started over on the mitts several times since this is only my second knitting project and switched from using four DPNs to using five. Lynne has been very helpful with suggestions for working the mitts and her Spiralling Leaves Fingerless Mitts as well (which is my next knitting project as I have the pattern and yarn all ready to go).
The image below shows my progress on the Spirogyra mitts, after 6 rows of ribbing and 10 rows of the pattern.

Apparently, I'm also knitting inside out as when I work the right side of the piece is inside the round when it is supposed to be on the outside ... oh well.
Spirogyra pattern at Knittyspin: Spring 2008 - free pattern
Spirogyra page at Ravelry
Spiralling Leaves page at Ravelry
Shorah Y'all!
The first is the Glamour top from Patons using their Grace yarn. I'd started it in Ginger for my sister Jennifer but yesterday found enough of the Azure colorway at Michael's to switch to that color. Especially since she really wanted the blue anyway. I'll save the green for another project for myself.
You can see the top here on the Paton's site: Glamour top - it's the one on the cover of the booklet. The instructions are a bit obtuse on some points so I started a post at Ravelry in the Patons Beehive forum to discuss it.
Since I restarted the top last night, I have one of the sleeve medallions done and about an 1.5" of the back completed.
Here is the back portion:

and the sleeve medallion:

Queue up on Ravelry
The second project is the Spirogyra Fingerless Mittens by Lynne Vogel, available for free at Knitty.com. I've started over on the mitts several times since this is only my second knitting project and switched from using four DPNs to using five. Lynne has been very helpful with suggestions for working the mitts and her Spiralling Leaves Fingerless Mitts as well (which is my next knitting project as I have the pattern and yarn all ready to go).
The image below shows my progress on the Spirogyra mitts, after 6 rows of ribbing and 10 rows of the pattern.

Apparently, I'm also knitting inside out as when I work the right side of the piece is inside the round when it is supposed to be on the outside ... oh well.
Spirogyra pattern at Knittyspin: Spring 2008 - free pattern
Spirogyra page at Ravelry
Spiralling Leaves page at Ravelry
Shorah Y'all!
Friday, April 18, 2008
A few finished projects
One of my bosses ordered an afghan for his mother, the Vanna's Choice 8-Color Afghan. I started it on March 21st and finished it on April 15th. It is made up of 48 squares instead of the original 36 called for.

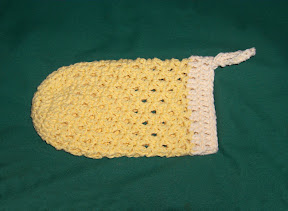
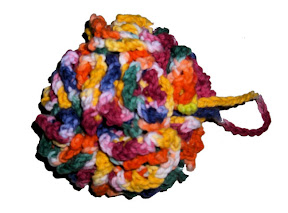
I also made a few bath items from the Annie's Attic Pamper Yourself booklet. I was able to get it in PDF format from e-Patterns Central, which I love being able to do (no books lying around to trip over). So far I've made the bath mitt, body puff, and soap holder. I believe the back scrubber will be next.
Here's the soap holder made with Lily Sugar'n Cream Cream color and an H/8 hook:

And the bath mitt made with Lily Sugar'n Cream Sunshine and Cream colors and an H/8 hook:

And the body puff made with Elmore Pisgah Peaches & Creme in Gumdrop, with a bit of Fiesta since I ran out of the Gumdrop, and an H/8 hook:

The bath items were easy to make, but the body puff got a bit awkward to hold, especially since I have small hands. It was also a bit more time consuming than I would have liked but it's a good project to pamper yourself with.
A note on e-Patterns Central, when you order the PDF patterns, they are stored in your account so if you ever need them again, they are there waiting for you. They mostly have individual patterns but also have some booklets and magazines (knitting, crochet, beading, etc.). They have patterns for knitting, crochet, sewing, quilting, plastic canvas, cross stitch, and crafts.
Shorah Y'all!

I also made a few bath items from the Annie's Attic Pamper Yourself booklet. I was able to get it in PDF format from e-Patterns Central, which I love being able to do (no books lying around to trip over). So far I've made the bath mitt, body puff, and soap holder. I believe the back scrubber will be next.
Here's the soap holder made with Lily Sugar'n Cream Cream color and an H/8 hook:

And the bath mitt made with Lily Sugar'n Cream Sunshine and Cream colors and an H/8 hook:

And the body puff made with Elmore Pisgah Peaches & Creme in Gumdrop, with a bit of Fiesta since I ran out of the Gumdrop, and an H/8 hook:

The bath items were easy to make, but the body puff got a bit awkward to hold, especially since I have small hands. It was also a bit more time consuming than I would have liked but it's a good project to pamper yourself with.
A note on e-Patterns Central, when you order the PDF patterns, they are stored in your account so if you ever need them again, they are there waiting for you. They mostly have individual patterns but also have some booklets and magazines (knitting, crochet, beading, etc.). They have patterns for knitting, crochet, sewing, quilting, plastic canvas, cross stitch, and crafts.
Shorah Y'all!
Friday, March 21, 2008
Weave-It Purse
I was going to put this purse pattern up at Ravelry as a PDF file, but since it is so simple, I decided to just post it here and link to it at Ravelry. I originally made the purse for a 2005 fiber arts class at the University of Houston - Clear Lake and it makes a fun purse for a little girl, or, when made with less garish colors, could even be a sweet party purse.
This little purse uses squares woven on a Weave-It Loom along with crocheted straps. Weave-It looms can be found on eBay and at flea markets or antique stores, but newer versions of this type of loom can be found at Buxton Brook Looms and Hazel Rose Looms. You can also crochet or knit 3.5” squares instead. Different weaving patterns can be found in several books and downloads. You’ll find links to these sites at the end of the instructions.Supplies:
Loom: Weave-It, Weavette, or Hazel Rose 4” square loom and weaving needleYarn: Sample uses Red Heart Kids Solid: Navy, Lime, Orange, Pink, and Yellow
Button: 1” button to match yarn used
Fabric: Approx. ¼ yard matching fabric for lining
Crochet Hook: I/9 or size to match selected yarn
Body:
Weave 2 plain weave squares each of the lime, orange, pink, and yellow yarns.
Weave 1 patterned square of the navy yarn. (See the eLoomaNation site for some patterns.)
Note: If you use a thinner yarn, you may need to double up when warping the loom and weaving, otherwise the holes will be too large.
For front of purse, use the navy yarn to whip stitch four squares together, one each of the lime, orange, pink, and yellow. Repeat for back of purse.
Place the navy square in the center of the purse front and sew it to the front using the navy yarn.
Place the front and back together, wrong sides together. Use the navy yarn and stitch three of the sides together, leaving one side open. Note on the sample that I used a very simple in and out stitch over two threads. It doesn't have to be perfect either.
Strap:
With navy yarn, attach with sc to the front right corner loop of the front piece. Sc in each of the next 4 loops at the top of the woven square. *Ch 3, turn, 1 dc in each dc across.* Repeat from * to * until strap is as long as needed. Sample strap is 20" long. When strap is long enough, attach with sc to the left corner of the back of the purse (see photo below).
Closure:
Closure is made separately then sewn to the back of the purse.
Ch 10, turn, ch 2, hdc in each ch across, turn, ch 2, hdc in each ch across, turn, ch 1, sc in each hdc across. When you reach the end, ch 1, sc in end of first row of hdcs, ch 10, sc in end of next hdc row, fasten off.
Place finished closure at back of purse, on the outside, centering it over the top two squares. Use the navy yarn to attach it securely to the back.
Button:
Fold the closure over to the front of the purse and mark where the button will go using a straight pin. Attach the button at the marked location.
Lining:
Measure the purse width and height and add 1" to each measurement, for example, purse is 7" sq + 1" = 8". Cut two squares of the lining fabric using the measurement just taken. With wrong sides together, sew three sides together using a 1/2" seam. On the open end, fold down the edge 1/2" with the raw edge on the wrong side. Turn the pocket right side out and put inside the purse. Line up the top folded edge of the lining with the top of the purse, making sure the folded edge is below the loops of the woven squares. Sew the top of the lining to the purse top edge. It can be hand sewn, but a machine sewn stitch will be stronger.
And that is it!
Links to sites to purchase small looms and instructions, or find free patterns, etc.
- Buxton Brook Looms – Basic instructions online and flip book: Modular Textures: Patterns for the Weavette® & Weave-it Looms with 30 patterns
- Weavies – Weavies One book, 16 projects
- eLoomaNation – Exploration of small looms, history, download PDF versions of old Weave-It booklets and user guides for different versions of the small looms
- eLoomanator – Blog for the eLoomaNation site, ideas, patterns, and more.
Shorah Y'all!
Labels:
crochet,
free pattern,
Hazel Rose,
purse,
Weave-it,
Weavette
Wednesday, March 12, 2008
Sante Fe Phone Cozy ...
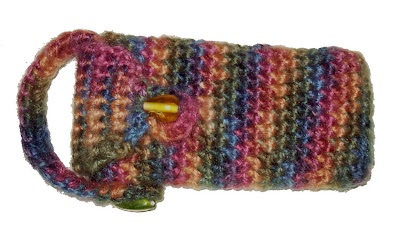
I showed my first cozy to several co-workers and one said that she wanted one, so this evening I pulled some yarn out of my stash (I'm looking for projects to use up some of my stash) and made her a phone cozy. The yarn is a discontinued Lion Brand Jiffy (color: Sante Fe). When I was in Houston, Michael's had them at a large discount because they were being discontinued and I bought all they had.
Anyway, while making this cozy, I realized I'd made an error in my original pattern and was able to fix it. Hopefully, Amanda will love it (although I'm not that crazy about the beads I used but they were all I had). Hmmm ... may have used too much color correction on the photo ... ah well.
Shorah Y'all!
Anyway, while making this cozy, I realized I'd made an error in my original pattern and was able to fix it. Hopefully, Amanda will love it (although I'm not that crazy about the beads I used but they were all I had). Hmmm ... may have used too much color correction on the photo ... ah well.
Shorah Y'all!
Tuesday, March 11, 2008
Tangled Thread Project #3
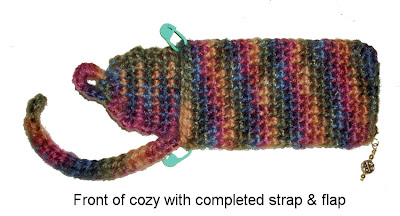
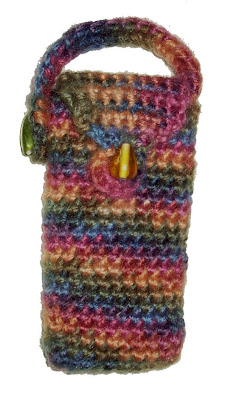
Yes, I know, I posted a project yesterday but I'd been wanting to make a phone cozy and since my internet connection at home was down, I pulled out some yarn that had been lying around for a while and started in on the project. The pattern is extremely easy and can be modified to make cozies for small game systems, like PSP and Nintendo DS, mp3 players, or even purses.
Quick, seamless cozy for any accessory: cell phones, mp3 players, PSP or Nintendo DS system, or even a purse … just adjust the beginning chain to fit the accessory and start crocheting up! The cell phone cozy is just big enough to hold your phone, a credit/debit card, and a few dollars extra. Attach to your belt loop and head off for shopping or a day of fun at the boardwalk.
I wrote these instructions as I made the cell phone cozy so please let me know if anything needs correcting, especially for the game system cozy or purse.
Supplies:
Yarn: Lion Brand Wool-Ease Worsted Weight (version in pattern uses Autumn Print) or any other similar weight yarn; can also double up a thinner yarn. Variegated yarn works wonderfully with this design.
Buttons or Beads: Coordinating with yarn, large enough to hold strap and flap closed.
Crochet Hook: I/9 or hook to match selected yarn
Base:
For cell phone or mp3 player, ch 11 (more if item is wider, less if smaller) sc in second ch from hook and each ch across to end, sc 3 in first ch and continue around with a sc in each ch to last ch, 2 sc in last ch, join with sc in first sc. Mark as RS near last st of round.
For game systems, ch as many ch as needed to cover length of accessory, plus 1 ch, sc in second ch from hook and each ch across to end, sc 3 in first ch and continue around with a sc in each ch to last ch, 2 sc in last ch, join with sc in first sc. Continue around with sc in each sc and two sc in each of the three end sc. Join with sc in first sc. If base is wide enough to fit the end of the accessory with a bit of room to spare, continue to body, otherwise, do another round. Mark as RS near last st of round.
For a purse, decide on how high, wide, and long purse is to be. For beg ch, subtract an inch from the length and crochet a ch to that length. Sc in second ch from hook and each ch across to end, sc 3 in first ch and continue around with a sc in each ch to last ch, 2 sc in last ch, join with sc in first sc. Continue around with sc in each sc and two sc in each of the three end sc. Join with sc in first sc. Continue crocheting in the round until base is as wide as needed. Mark as RS near last st of round. Make a not of width of base as this will be needed for flap.
Note: As you add scs for body, the piece will start to curl up. If needed, flip the piece so that the RS stitch marker is outside the piece … or fasten off and provide a local faerie or your favorite house pixie with a sweet bed.
Body:
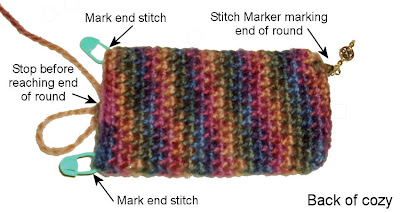
For cell phone, mp3 player, or game system, crochet in the round with sc in each sc around until body is long enough for the accessory to fit in comfortably with room to spare. Stop before the side of the cozy on the same side as the base stitch marker. Lay piece flat and mark st at each end.
For purse, continue until body reaches the needed height. Stop before the side of the purse on the same side as the base stitch marker. Lay piece flat and mark st at each end.
For a cell phone or mp3 player, if adding a strap, continue placing a sc in each sc until you reach the st before the first marker, sl st in that st (not in the one with the marker in it).
For a purse, if adding a strap, continue placing a sc in each sc until you reach the second st before the first marker, sl st in that st.
For all, if skipping the strap, continue placing sc in each sc until you reach the stitch marker, remove marker and sc in that st. Do not fasten off and skip to flap section.
Strap:
For cell phone or mp3 player, ch 22 (or more if longer strap is needed), hdc in third ch from hook, ch 1, sk 1 ch, hdc in next ch (buttonhole made), hdc in each ch across, join with sc in sc on other side of stitch marker on the back side of the cozy (do not join in same st as marker).
If not making a flap, sl st in same sc as marker and fasten off. Skip to bead/button section and add side bead/button only.
For purse or game system, decide how long strap needs to be and ch as many sts as needed for length. Attach with sc to second st before marker on other side, on front side of purse. Sl st in next sc before stitch marker, sc in same sc as stitch marker, hdc in first ch of strap and in each ch across. At end of strap, sc in same sc as stitch marker, sl st in sc after stitch marker (back side), sc in next sc, hdc in first hdc and in each hdc across. At end of strap, sc in second sc after stitch marker (back side).
Flap:
For cell phone or mp3 player, continue placing sc in each sc on back side of cozy across to second st before marker. Do not sc in st before marker. *Ch 1, turn, sc in each sc across to sc before strap*, ch 1, turn. Repeat from * to * four more times (6 rows).
*Ch 1, turn, decrease over next 2 scs, sc across to last 2 scs, decrease over last 2 sc*, ch 1, turn. Repeat from * to * until only 3 sts remain.
Ch 3, turn, skip middle sc, sc in last sc, ch 1, turn, 10 sc in loop, sl st in first sc of last row of three, fasten off. Button loop made. Weave in ends.
For purse or game system, continue placing sc in each sc on back side of purse to last sc before strap on other side. *Ch 1, turn, sc in each sc across to sc before other side of strap*, ch 1, turn. Repeat from * to * until flap is twice as long as the width of the base (you did remember to note
that down, right?).
*Ch 1, turn, decrease over next 2 scs, sc across to last 2 scs, decrease over last sc*, ch 1, turn. Repeat from * to * until only 5 sts remain.
Ch 5, turn, skip 3 sc, sc in last sc, ch 1, turn, 15-20 sc in loop depending on how many you like, sl st in first sc of last row of three, fasten off. Button loop made. Weave in ends.
Note: If loop for purse is too small or large for the selected bead or button, increase or decrease the ch for the loop and adjust how many scs in loop to match.
Buttons or Beads:
Attach a button or large bead at side of cozy/purse, opposite of where strap is attached. Fold flap over to front and mark where button/bead should be to go through loop. Attach the button or large bead at that location. See image below for example of placement.
Please do not distribute this pattern without permission, instead, send them here or to the pattern page at Ravelry. You may sell what you make using this pattern as long as it is not mass produced (i.e, a few items at a craft show are okay). If you'd like to sell more than a few items, please contact me. Making items for personal use or as gifts or donated to charities is not restricted at all.
Enjoy!
Shorah Y'all!
Accessory Cozy or Purse
Quick, seamless cozy for any accessory: cell phones, mp3 players, PSP or Nintendo DS system, or even a purse … just adjust the beginning chain to fit the accessory and start crocheting up! The cell phone cozy is just big enough to hold your phone, a credit/debit card, and a few dollars extra. Attach to your belt loop and head off for shopping or a day of fun at the boardwalk.
I wrote these instructions as I made the cell phone cozy so please let me know if anything needs correcting, especially for the game system cozy or purse.
Supplies:
Yarn: Lion Brand Wool-Ease Worsted Weight (version in pattern uses Autumn Print) or any other similar weight yarn; can also double up a thinner yarn. Variegated yarn works wonderfully with this design.
Buttons or Beads: Coordinating with yarn, large enough to hold strap and flap closed.
Crochet Hook: I/9 or hook to match selected yarn
Base:
For cell phone or mp3 player, ch 11 (more if item is wider, less if smaller) sc in second ch from hook and each ch across to end, sc 3 in first ch and continue around with a sc in each ch to last ch, 2 sc in last ch, join with sc in first sc. Mark as RS near last st of round.
For game systems, ch as many ch as needed to cover length of accessory, plus 1 ch, sc in second ch from hook and each ch across to end, sc 3 in first ch and continue around with a sc in each ch to last ch, 2 sc in last ch, join with sc in first sc. Continue around with sc in each sc and two sc in each of the three end sc. Join with sc in first sc. If base is wide enough to fit the end of the accessory with a bit of room to spare, continue to body, otherwise, do another round. Mark as RS near last st of round.
For a purse, decide on how high, wide, and long purse is to be. For beg ch, subtract an inch from the length and crochet a ch to that length. Sc in second ch from hook and each ch across to end, sc 3 in first ch and continue around with a sc in each ch to last ch, 2 sc in last ch, join with sc in first sc. Continue around with sc in each sc and two sc in each of the three end sc. Join with sc in first sc. Continue crocheting in the round until base is as wide as needed. Mark as RS near last st of round. Make a not of width of base as this will be needed for flap.
Note: As you add scs for body, the piece will start to curl up. If needed, flip the piece so that the RS stitch marker is outside the piece … or fasten off and provide a local faerie or your favorite house pixie with a sweet bed.
Body:
For cell phone, mp3 player, or game system, crochet in the round with sc in each sc around until body is long enough for the accessory to fit in comfortably with room to spare. Stop before the side of the cozy on the same side as the base stitch marker. Lay piece flat and mark st at each end.
For purse, continue until body reaches the needed height. Stop before the side of the purse on the same side as the base stitch marker. Lay piece flat and mark st at each end.
For a cell phone or mp3 player, if adding a strap, continue placing a sc in each sc until you reach the st before the first marker, sl st in that st (not in the one with the marker in it).
For a purse, if adding a strap, continue placing a sc in each sc until you reach the second st before the first marker, sl st in that st.
For all, if skipping the strap, continue placing sc in each sc until you reach the stitch marker, remove marker and sc in that st. Do not fasten off and skip to flap section.
Strap:
For cell phone or mp3 player, ch 22 (or more if longer strap is needed), hdc in third ch from hook, ch 1, sk 1 ch, hdc in next ch (buttonhole made), hdc in each ch across, join with sc in sc on other side of stitch marker on the back side of the cozy (do not join in same st as marker).
If not making a flap, sl st in same sc as marker and fasten off. Skip to bead/button section and add side bead/button only.
For purse or game system, decide how long strap needs to be and ch as many sts as needed for length. Attach with sc to second st before marker on other side, on front side of purse. Sl st in next sc before stitch marker, sc in same sc as stitch marker, hdc in first ch of strap and in each ch across. At end of strap, sc in same sc as stitch marker, sl st in sc after stitch marker (back side), sc in next sc, hdc in first hdc and in each hdc across. At end of strap, sc in second sc after stitch marker (back side).
Flap:
For cell phone or mp3 player, continue placing sc in each sc on back side of cozy across to second st before marker. Do not sc in st before marker. *Ch 1, turn, sc in each sc across to sc before strap*, ch 1, turn. Repeat from * to * four more times (6 rows).
*Ch 1, turn, decrease over next 2 scs, sc across to last 2 scs, decrease over last 2 sc*, ch 1, turn. Repeat from * to * until only 3 sts remain.
Ch 3, turn, skip middle sc, sc in last sc, ch 1, turn, 10 sc in loop, sl st in first sc of last row of three, fasten off. Button loop made. Weave in ends.
For purse or game system, continue placing sc in each sc on back side of purse to last sc before strap on other side. *Ch 1, turn, sc in each sc across to sc before other side of strap*, ch 1, turn. Repeat from * to * until flap is twice as long as the width of the base (you did remember to note
that down, right?).
*Ch 1, turn, decrease over next 2 scs, sc across to last 2 scs, decrease over last sc*, ch 1, turn. Repeat from * to * until only 5 sts remain.
Ch 5, turn, skip 3 sc, sc in last sc, ch 1, turn, 15-20 sc in loop depending on how many you like, sl st in first sc of last row of three, fasten off. Button loop made. Weave in ends.
Note: If loop for purse is too small or large for the selected bead or button, increase or decrease the ch for the loop and adjust how many scs in loop to match.
Buttons or Beads:
Attach a button or large bead at side of cozy/purse, opposite of where strap is attached. Fold flap over to front and mark where button/bead should be to go through loop. Attach the button or large bead at that location. See image below for example of placement.
Please do not distribute this pattern without permission, instead, send them here or to the pattern page at Ravelry. You may sell what you make using this pattern as long as it is not mass produced (i.e, a few items at a craft show are okay). If you'd like to sell more than a few items, please contact me. Making items for personal use or as gifts or donated to charities is not restricted at all.
Enjoy!
Shorah Y'all!
Monday, March 10, 2008
Tangled Thread Project #2
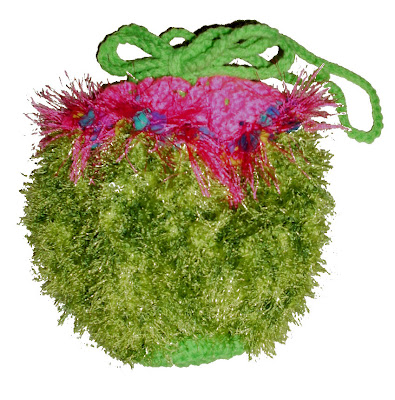
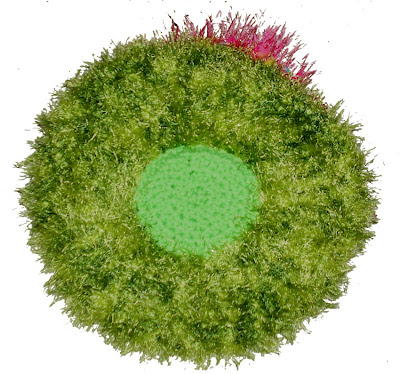
My second Tangled Thread project is a fun Watermelon Purse I designed for a class a few years back. I'd love to see what you folks do with it!
Supplies:
Base and tie: Small amount of medium worsted weight green yarn.
Body: Green eyelash yarn, such as Lion Brand Fun Fur Lime, Crystal Yarns Fizz in Electric Lime or Grass Greens, etc.
Seeds: Lion Brand Fancy Fur, Firecracker Red or Party Pink
Top: Small amount of medium worsted weight pink or red yarn (select yarn color to match the Fancy Fur color selected)
Crochet Hook: I/9
Base:
With green yarn, ch 5, join with sl st, ch 2 (beginning hdc), hdc in same ch, 2 hdc in each ch around, join with hdc, hdc in same st. Continue placing 2 hdc in each st around until circle is 3.25-3.5” across. Fasten off.
Body:
Row 1: Join green eyelash yarn with sl st to last hdc on bottom piece. Ch 3 (beg hdc plus 1 ch), *hdc in next hdc, ch 1*, repeat from * to * around. Join with.sl st in top of second ch of beginning hdc.
Row 2: Ch 3 (beg hdc plus 1 ch), *hdc in next hdc, ch 1*, repeat from * to * around. Join with.sl st in second ch of beginning hdc.
Row 3: Sl st in first space, Ch 3, hdc in same space, ch 1, *hdc in next space, ch 1, hdc in same space, ch 1*, repeat from * to * around, join with sl st in second ch of beg hdc.
Rows 4: Ch 3, *hdc in next hdc, ch 1*, repeat from * to * around, join with sl st in second ch of beg hdc.
Row 5: Repeat row 4.
Row 6: Ch 4, *sc in next hdc, ch 4*, repeat from * to * around, join with sc in first sl st.
Row 7: Sl st in first space, ch 4, *sc in next space, ch 4*, repeat from * to * around, join with sc in first sl st.
Rows 8-10: Repeat row 7.
Row 11: Sl st in first space, ch 3 (beg hdc plus 1 ch), *hdc in next space, ch 1*, repeat from * to * around, join with sl st in second ch of beg hdc.
Row 12: Ch 2 (beg hdc), hdc in each space and hdc around, join with sl st in second ch of beg hdc.
Rows 13 & 14: Repeat row 12. Fasten off at end of row 14.
Seeds:
Row 15: Join pink or red Fancy Fur with sl st in any hdc. Ch 2 (beg hdc), hdc in each hdc around, join with sl st in second ch of beg hdc. Fasten off.
Top:
Row 16: Join pink or red ww yarn with sc in any hdc, sc in each hdc around.
Row 17: Ch 2 (beg hdc), hdc in each sc around, join with sl in sec ch of beg hdc.
Row 18: (Tie row) Ch 3 (beg dc), dc in next hdc, ch 1, *dc in next 2 hdc, ch 1*, repeat from * to * around. Fasten off.
Note: If you find that you have an extra or one too few hdc when ending this row, adjust the last set of dc by putting 2 dc in one hdc or skip two hdc instead of one at the end.
Tie:
Measure the circumference of the top of the purse. With green ww yarn, make a chain the length measured plus 12”. Fasten off.
Loop the chain through the top row of the purse, leaving about 3” of the end of the chain at the beginning. Halfway around, leave a 6” loop hanging out and continue threading the chain through. At the end, knot the ends together. To close the purse, hold both loops in one hand, wrap other hand around the loops and pull down.
Note: to make a stronger tie, make the chain with two strands of yarn.
Use the purse as is or add a simple lining.
Other fruit suggestions:
Strawberry: Use Lion Brand Fancy Fur Firecracker Red for the body & seeds section, with red ww for the base and top, and green for the tie.
Red Apple: Use a solid red eyelash yarn for body and seeds section, with red ww for the base and top, and green for the tie.
Green Apple: Use a solid green/lime eyelash yarn for body and seeds section, with green ww for the base and top, and green for the tie.
Or how about a blueberry or a lemon or ….
Please do not distribute this pattern without permission, instead, send them here or to the pattern page at Ravelry. You may sell what you make using this pattern as long as it is not mass produced (i.e, a few items at a craft show are okay). If you'd like to sell more than a few items, please contact me. Making items for personal use or as gifts or donated to charities is not restricted at all.
Enjoy!
Shorah Y'all!
Watermelon Purse
Supplies:
Base and tie: Small amount of medium worsted weight green yarn.
Body: Green eyelash yarn, such as Lion Brand Fun Fur Lime, Crystal Yarns Fizz in Electric Lime or Grass Greens, etc.
Seeds: Lion Brand Fancy Fur, Firecracker Red or Party Pink
Top: Small amount of medium worsted weight pink or red yarn (select yarn color to match the Fancy Fur color selected)
Crochet Hook: I/9
Base:
With green yarn, ch 5, join with sl st, ch 2 (beginning hdc), hdc in same ch, 2 hdc in each ch around, join with hdc, hdc in same st. Continue placing 2 hdc in each st around until circle is 3.25-3.5” across. Fasten off.
Body:
Row 1: Join green eyelash yarn with sl st to last hdc on bottom piece. Ch 3 (beg hdc plus 1 ch), *hdc in next hdc, ch 1*, repeat from * to * around. Join with.sl st in top of second ch of beginning hdc.
Row 2: Ch 3 (beg hdc plus 1 ch), *hdc in next hdc, ch 1*, repeat from * to * around. Join with.sl st in second ch of beginning hdc.
Row 3: Sl st in first space, Ch 3, hdc in same space, ch 1, *hdc in next space, ch 1, hdc in same space, ch 1*, repeat from * to * around, join with sl st in second ch of beg hdc.
Rows 4: Ch 3, *hdc in next hdc, ch 1*, repeat from * to * around, join with sl st in second ch of beg hdc.
Row 5: Repeat row 4.
Row 6: Ch 4, *sc in next hdc, ch 4*, repeat from * to * around, join with sc in first sl st.
Row 7: Sl st in first space, ch 4, *sc in next space, ch 4*, repeat from * to * around, join with sc in first sl st.
Rows 8-10: Repeat row 7.
Row 11: Sl st in first space, ch 3 (beg hdc plus 1 ch), *hdc in next space, ch 1*, repeat from * to * around, join with sl st in second ch of beg hdc.
Row 12: Ch 2 (beg hdc), hdc in each space and hdc around, join with sl st in second ch of beg hdc.
Rows 13 & 14: Repeat row 12. Fasten off at end of row 14.
Seeds:
Row 15: Join pink or red Fancy Fur with sl st in any hdc. Ch 2 (beg hdc), hdc in each hdc around, join with sl st in second ch of beg hdc. Fasten off.
Top:
Row 16: Join pink or red ww yarn with sc in any hdc, sc in each hdc around.
Row 17: Ch 2 (beg hdc), hdc in each sc around, join with sl in sec ch of beg hdc.
Row 18: (Tie row) Ch 3 (beg dc), dc in next hdc, ch 1, *dc in next 2 hdc, ch 1*, repeat from * to * around. Fasten off.
Note: If you find that you have an extra or one too few hdc when ending this row, adjust the last set of dc by putting 2 dc in one hdc or skip two hdc instead of one at the end.
Tie:
Measure the circumference of the top of the purse. With green ww yarn, make a chain the length measured plus 12”. Fasten off.
Loop the chain through the top row of the purse, leaving about 3” of the end of the chain at the beginning. Halfway around, leave a 6” loop hanging out and continue threading the chain through. At the end, knot the ends together. To close the purse, hold both loops in one hand, wrap other hand around the loops and pull down.
Note: to make a stronger tie, make the chain with two strands of yarn.
Use the purse as is or add a simple lining.
Other fruit suggestions:
Strawberry: Use Lion Brand Fancy Fur Firecracker Red for the body & seeds section, with red ww for the base and top, and green for the tie.
Red Apple: Use a solid red eyelash yarn for body and seeds section, with red ww for the base and top, and green for the tie.
Green Apple: Use a solid green/lime eyelash yarn for body and seeds section, with green ww for the base and top, and green for the tie.
Or how about a blueberry or a lemon or ….
Please do not distribute this pattern without permission, instead, send them here or to the pattern page at Ravelry. You may sell what you make using this pattern as long as it is not mass produced (i.e, a few items at a craft show are okay). If you'd like to sell more than a few items, please contact me. Making items for personal use or as gifts or donated to charities is not restricted at all.
Enjoy!
Shorah Y'all!
Subscribe to:
Posts (Atom)