Sunday, April 29, 2012

Crochet Uncut Spring 2012 Issue Published

I realized today that I forgot to post here that I'd released the Spring 2012 issue of Crochet Uncut. I posted on Facebook, Ravelry, and Google+, added the photos to Pinterest as well, but forgot to post it here.

Anyway, the issue contains two patterns and a tutorial, again all my designs. All three have symbol crochet charts made using the Crochet Charts software made by Stitch Works Software. If you design crochet, this is an invaluable tool. It really helped me with the design for the Tangleweb Afghan. I did a review of this software in a previous issue of Crochet Uncut and some additional updates have been made since then with more in the works.

The tutorial is for a six pointed star that you join as you go. Make a few of them for a pillow or add more for a wrap or afghan. Use different yarns to get a light wrap or heavier yarn for larger stars.

Star Light Star Bright Tutorial

The first pattern can be made into an afghan, wrap, or scarf. Instructions are provided to make just the size you need. I've already started projects for a baby blanket and a curtain for the back door to keep out the flies while allowing Mr. Darcy to spend time outside without us having to keep an eye on him. I'm also working on a variation to the design for an infinity scarf which I'll probably have up for sale on Ravelry once it's completed.
Tangleweb Afghan modeled by Mr. Darcy

The second pattern is for a bright spring purse that can also be easily modified to be larger or smaller or to change the size of the handles. It's a perfect way to use up a few leftover yards of yarn.
Tincture of Spring Purse

On a side note, I was offered quite a bit of money to sell Crochet Uncut, enough that I could have paid off my bills and moved back to Texas, but I turned the offer down. I talk about it a bit more in the Letter to the Editor for this issue, but I don't intend to sell the site ... ever!

Don't forget to check out the reviews and keep an eye out for some yarn reviews that will be added once the yarn arrives.

And here are the direct links to the patterns:

Remember, all patterns have a downloadable PDF version available. Just look for the PDF icon next to the Ravelry project page button.


I'm also continuing work on the Mrs. Claus Washing pattern. It's on the back burner for a bit but I'm hoping to get back to it soon. The free patterns I design and my painting always seem to take priority over patterns I'm planning on selling.

Oh, and before I forget, please feel free to follow the Pinterest board I created for Crochet Uncut and repin the projects you like. If you have a project you've completed following one of the patterns in Crochet Uncut and would like to have it added to the Pinterest board, send me an IM on Ravelry with a link to the project. Just remember that I can't pin images from Facebook so the image will have to be on located elsewhere in order to be pinned, for example, Ravelry, Flickr, a blog, etc.

Links to our Facebook fan page, Google+ page, Twitter, and Pinterest board can always be found on the left menu on Crochet Uncut.

Hope you enjoy the patterns!

Tuesday, April 10, 2012

Double-Sided Crochet Tutorial

So, I thought I'd posted this here but can't find it anywhere and since I really don't have a lot of posts, it should have been easy to find if it were here.

Anyway, when I lived closer to Sandy, UT, I'd pop into Unraveled Sheep quite often and even taught some crochet classes there. Twice I've been asked to decipher "old family patterns" and one was the diagonal box stitch and the other was a double sided crochet design with old terms that the lady who brought it in couldn't decipher.

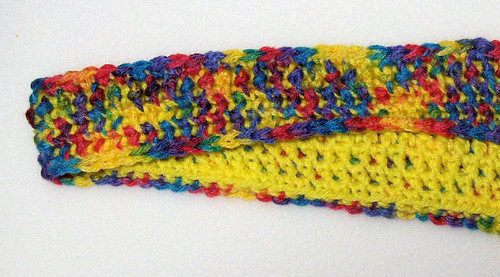
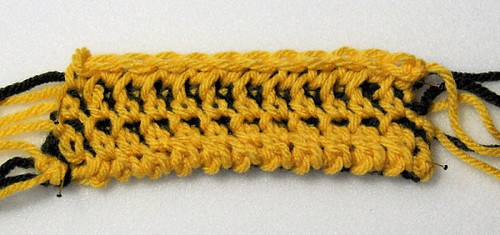
These photos are my results:


The free tutorial is up on Ravelry if you're interested. It makes for a very thick fabric but if you use a thinner yarn, it won't be quite as thick or warm.

Thursday, February 02, 2012

Tatting, more Crochet, and a Dr. Who Scarf started

It's been a while, but I've been busy so that's my excuse and I'm sticking with it.

Christmas was very quiet, as usual, with just my sister and the furries. We didn't get a ham this year as we were leaving for Austin three days later and wouldn't be able to finish it in time.

In Austin, we stayed with sister Jenny and her husband Brian and traveled back and forth to San Antonio to attend the Air Force basic training graduation ceremonies. My oldest nephew Clay was our proud Airman. His mother, Darlene was there with her husband Jimmy (who is in the Army) and their other five boys (one is a foster son).

Airman Jimmy Clay Smith, Jr.

And, of course, we had to get a photo of the proud mom and aunts ...

Jessica, Jenny, Darlene, Darlisa

We spent a week and a half in Austin (saved $180 in airfare that way) and one evening Jenny was showing us her needle tatting. Years ago I'd purchased a learn needle tatting book but never tried it. I had tried shuttle tatting but it never clicked and the way the shuttle had to be used just seemed weird to me. Last Saturday, Jess said she wanted to learn so I bought a few more needles and some thread. Once we got home, I found the book in my library, figured it out and taught Jess. I taught her to knit a few weeks back so we'll see which one she keeps up with. On Sunday, I started tatting a heart that was a free pattern at Hobby Lobby (and is also online at Handy Hands Tatting) and finished it on Tuesday. The picots are too big and one of the side chains has an extra picot, but not too bad for a first try.

I've already started a larger project. It's go big or go home for me when it comes to doing stuff!

My brother-in-law, Brian (Jenny's husband) is a huge Dr. Who fan (well, so is Jenny) and he asked me to make him a Season 16 Scarf. There are several sites with patterns but I settled on the one at the Witty Little Knitter because the yarn selections were all one brand and I could order them online. Another site that is good for patterns is DoctorWhoScarf.com.

So far I have 190 rows completed but the pic below shows it after about 130 rows or so.


I used the Scarf-o-matic to calculate how much I have completed and, since it's too long to put here, I've added it to the header of my blog instead.

In other news, I finished an afghan design that I'm really proud of. I started it before Christmas, worked on it on the plane, in the airport, and while in Austin, then finished it when I got home. The full pattern, with guidelines on making it into a scarf or wrap instead, will be in the next issue of Crochet Uncut.

Wednesday, December 14, 2011

New painting - Indian Chief Head Study

So, last year I asked Jon McNaughton if we could do a head study of a dark skinned person and this is the result. I haven't been able to take classes for the last several months because of finances but had saved up so I could attend this class. I'm really really trying to spend more time painting but it's not easy when you're working full time and sewing items on commission just to make ends meet.

Anyhow, here is the painting:

The painting can be purchased in my Artfire shop as well as other locations.

Saturday, December 03, 2011

Santa's Washing Errata

As hard as I try, sometimes patterns get a few mistakes that hide until it's too late. I'll post any changes to the Santa's Washing crochet pattern here and also update the PDF pattern on Ravelry.

Socks:

Row 7: Ch 1, turn, sc in ea sc across. (6 sts)

Row 13: (Dec rows) Ch 1, turn, sc2tog, sc in next 2 sc, sc2tog. (4 sts)

Saturday, November 19, 2011

Santa's Washing pattern available on Artfire

I've added the Santa's Washing pattern to my Artfire store. No automatic download but once I receive payment notification from Paypal and get home from work in the evenings, the PDF file will be mailed.

Sunday, November 13, 2011

Santa's Washing Crochet Pattern

I just uploaded a new crochet pattern to my Ravelry store, Santa's Washing. Pattern includes instructions for making a jacket, trousers, long johns, mittens, scarf, socks, and hat. I wanted to make sure the pieces could be made in any size yarn or crochet thread so only the thumbs on the mittens and the top part of the pants for the long johns are made in the round. The remaining pieces are all worked flat. So, even if you make them in size 50 crochet thread, you shouldn't have any problems!

Here are a few pictures of the finished banner, including a peek at the back of the long johns! Click on the images for larger views.

The banner hanging from my mantel

A closeup of the back of the long johns with the flap hanging open

A closer look at the banner

The pattern is $4.50 and can be purchased at Ravelry - buy now - pattern page

Also, the Fall 2011 issue of Crochet Uncut is finally out. Find out how to make African Flower Motifs and use them to make a purse, potholders, hotpads, and a pincushion, make a mat named BOB, and find out how to win a Knook!

Sunday, October 16, 2011

Halloween Kit for Digital Scrapbooking

I recently finished up some cool papers and frames for your fall or halloween digital scrapbooking. The kit includes 46 papers (12"x12"), 6 square frames (2.67"x2.67"), 17 doily frames (8.46"x8.46"), 11 text items, and a black pearl trim (12"x0.79"). Cost is just $12.00 for everything.


Wednesday, September 28, 2011

Make your own reversible project bag

I've had several requests for instructions on how I make my reversible project bags and I finally finished the instructions. Now, you can make your own, or, if you don't sew, you can visit my Artfire shop and buy one!

9/26/13 - Artfire shop closed, please check my etsy shop.

The bags can be made from any fabric but if you're short on cash, two fat quarters and some cotton yarn are all you need (other than thread and a sewing machine) to make your own bag.

Click on the image below to download the PDF file. You can use the instructions to make bags for personal use or for small business sales, i.e., no mass reproduction by a manufacturing company ... like that would happen ...

Saturday, September 17, 2011

Previews of the dresses

Got some photos of my little cousin Anya wearing some of the dresses I sent. The other girls haven't had a chance to see their's yet but they plan on getting together so they can take group photos. Sarah also sent me a short video of Anya in the dress with the green bodice and pink flowers, but not a photo of it. Anyway, here's Anya wearing the roses dress, matching green pinafore, and the pink paisley dress. I added matching reversible purses for each dress (except for the baby) as a surprise.

Sarah also sent me a photo (finally!) of Anya wearing the dress I crocheted for her. She's been able to wear it for three years already and I think that if they add a pink shrug with a button closure in the front, then she should be able to wear it a bit longer before passing it on to another cousin.


Am so looking forward to seeing pics of the other girl's in their new dresses.

Thursday, September 15, 2011

Two digital scrapbooking templates

This first template was made at Heritage Makers using textures completely made by me in Paint Shop Pro except for the folded paper which was made in Photoshop following a tutorial I found.. The heart and flower have "stitching" around the edges.


This second template was done in Paint Shop Pro, mostly with textures I made myself. The flowers and vines are from Jungle 3D but not sure where the pearl "lace" tube came from. The button, brads, and ribbon were all made following tutorials I found online.

Not sure yet what I'll do with them. I may give them away but would have to redo the first one in PSP first. I'll have to think on it for a bit ...

Tuesday, September 13, 2011

Folded Ribbon Script for Paint Shop Pro X3

While making some graphics for digital scrapbooking, I created a script to make a folded ribbon out of a horizontal one. You can create your own ribbon or use a photo of one that you've cleaned up.

The final ribbon will be 230x181 pixels if using the maximum horizontal ribbon size of 773x109 pixels.

The script is free for personal or commercial use. See the included readme for copyright, additional usage information, and instructions on using the script.


Download from Fignations of Imaginment - you do not have to create an account.

Tutorial for a similar ribbon but with angles cut opposite each other: Folding Ribbons in Paint Shop Pro X by Stacey Jewell Stahl.

Grosgrain ribbon made following this tutorial: Birgit's Grosgrain Ribbon Tutorial.

I would love to hear your comments on this script!

Sunday, September 11, 2011

Designing 3D Clothing in Marvelous Designer 2

A couple of weeks ago I won one of two first prizes in a review contest over at Marvelous Designer and got a copy of their software as a result. I had used the demo last year but couldn't afford the software but now I've been busy playing with it and first up is a ruffled tunic with leggings. The tunic is loosely shaped with slightly dropped shoulders and low under arm while the leggings are tight fitting. Click on the image for a larger view. Rendered in DAZ Studio with Victoria 4.


Of course, the meshes come out with triangles, which are great for Poser dynamic clothing but not so good for rigged clothing. I've been trying out a demo of 3DCoat and so far have seen awesome results. The image below shows the leggings from MD2, then retopo'd in 3DCoat, then tweaked in Cinema4D to remove the caps, adjust vertices, and UV Mapping. It does lose some detailing during the retopo but it's not enough for me to worry about. I'd rather have the general details that can be emphasized with textures than create more polys. I have high hopes. Click on the image for a larger view.

A few digital scrapbooking things

Since being introduced to Heritage Makers, I spent most of yesterday evening playing with making background textures, a few buttons and embellishments, etc. I have some stuff I'd made last year for an online game but these are all new and thought I'd show them off. These were all made in Paint Shop Pro, including the buttons. Click on the image for a larger view.

Saturday, September 10, 2011

A couple of cool scrapbooking products

Okay, I am not a scrapbooker. Mostly because I don't have the time, but also because it can be more expensive than I can afford. However, the kits, pages, adornments, etc., are hard to ignore sometimes. You can find some really cute things at stores and on the internet.

Today, my sister Jessica and I went to the Scrapbooks USA show in Sandy, UT. I was disappointed at the number of vendors there as they were all around the edges of the room and the entire middle of the room was set up with tables and chairs. There were people working there and I can only assume they were meeting others they'd met online to work with. Otherwise, I can't see doing scrapbooking in public like that, but then again, I'm not a scrapbooker. I was really expecting a whole lot more than what was there. We heard several people express the same thing.

While wandering around, I found two vendors that interested me.

The first was Perfect Paper Crafting, which had a ruler type device that allowed you to cut perfect lines at a specific length away from another line. For example, you could paste a photo down on a background mat, then place the inside lip of the ruler against the photo with the outer edge of the ruler exactly 1/", 1/2" or 3/8" or whatever away. Then take an X-acto knife and cut a perfect line exactly that distance away for a perfect mat. No more trying to manually place the photo exactly in the center of the mat. They also had a "Tear" ruler that you lay along the paper, wet down with water, then tear the edge away. It's a lot easier than trying to cut it or tear it manually. The third product they have is a tool to make perfect squares every time. They have a fourth product, a marker airbrush set, but I didn't see it there at the show.

The second vendor was Heritage Makers (links to my consultant so if you join, she'll be your consultant as well), which is local to me. Their software is used online where you can select from over 40,000 templates and graphics to create notecards, story books, canvas prints, photo gifts (calendars, prints, posters, playing cards, etc.), recipe books, digital scrapbooks, and more. Once you put your item together, you can order the printed version of your work to be delivered to your home. You also get publishing points that can be used towards your next published item. No having to deal with shopping at multiple stores for supplies, having to cut out papers, glue trims, mess with glitter (gets in all the cracks) or stickers, getting ink all over you, finding more storage for your supplies, toting all your stuff around in huge carry alls, etc. I have enough problems with finding storage for my yarn and paints!

They have a free account that has 2 GB of storage, access to 2,000+ pieces of digital art, and 450+ templates; and a premium account for $19.95/month that has unlimited storage, access to 40,000+ pieces of digital art, 3,000+ templates, and access to special perks. You can also host a scrapbooking workshop or become a consultant to start your own business. A referral program is coming soon. Oh, and you can also create your own templates for you or others to use. If you have a free account, you can only upload JPEG format graphics but with a premium account, you can also upload PNG format graphics that can be used as borders, frames, and embellishments. Once you come up with template that others can use, you can submit it to the gallery for approval. Make sure you watch the training videos to get help on using the software (although it is fairly intuitive, especially if you've used a paint program before). The only thing I found missing was a user forum, where users can help each other and they can show off their work to each other and get advice. You can, however, quickly access your consultant by using the contact form. They respond quickly and do their best to help you.

While both of these products are most likely to be used by scrapbookers, I can see them being used by other types of crafters and artists as well. I like that Heritage Makers has products for business as well as personal use.

Saturday, September 03, 2011

All Dresses Finally Finished!

Tadah!!!! Took me long enough but all dresses are finally done.

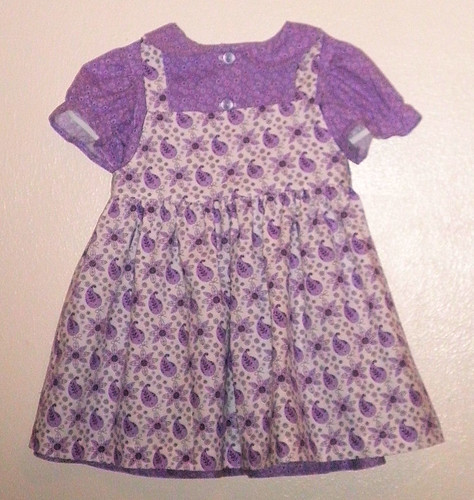
First, I finished a dress for Kasia that I'd actually almost finished a week or so ago. It just needed a hook and eye added. This is the same pattern as I'd made for her before, but added little ruffled sleeves to it.

McCalls 5835

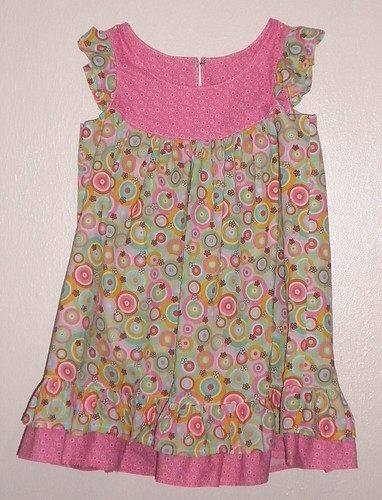
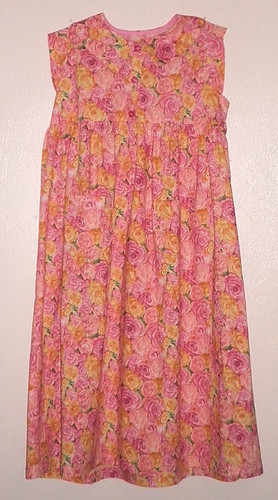
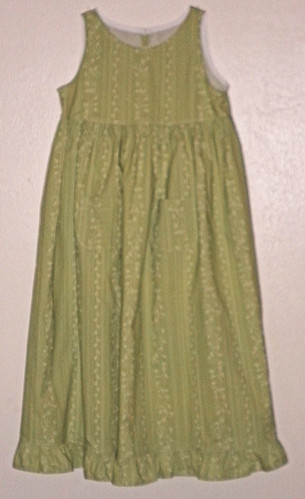
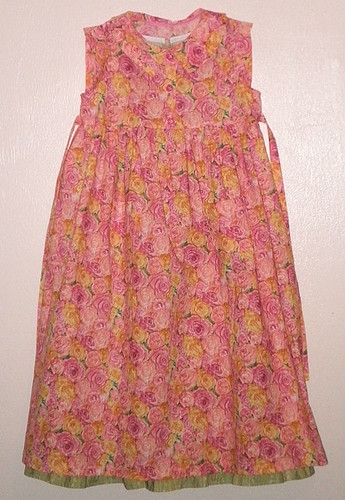
Next, I made a two dress set for Anya and Gabriella. A rose dress with little caplet sleeves and a matching "slip" dress. I added pockets to the slip dress since you can never have too many pockets. (Sorry for the fuzzy photo of the green slip dress. It didn't want to cooperate.)


Both can be worn separately or the slip dress worn under the rose dress. So cute as the green ruffle of the slip dress peeks out under the rose dress.

Simplicity 5226

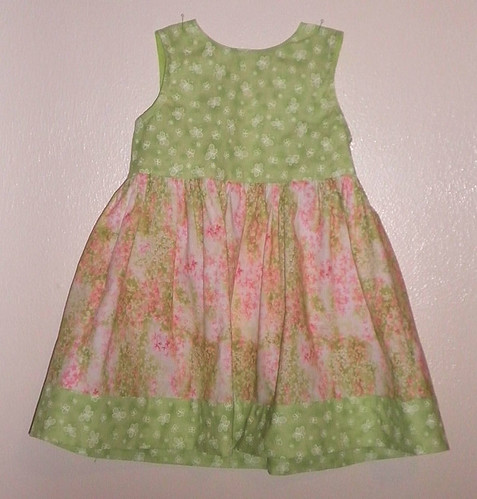
Next, a dress for Isabella, to match the outfit I'd originally made for her but I think is now too small and will go to Zosia instead.

New Look 6877

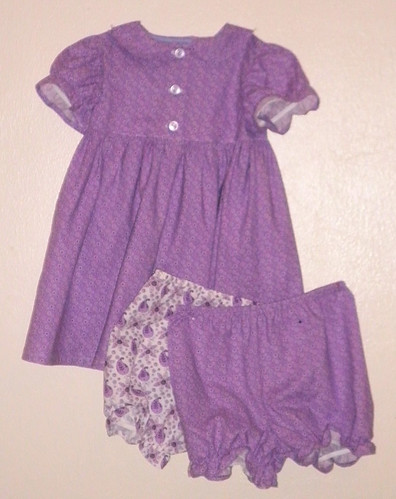
Finally, I made a dress and pinafore for Isabella. The dress can be worn alone and the matching panties can be switched out depending on how she wants to wear them. I also made a pinafore to go with it if a bit of extra warmth (or cuteness) is needed.


Simplicity 9784

Hopefully I'll have all the dresses packed up and shipped out sometime next week.

All total I made 13 dresses, 2 pinafores, 5 panties, and 3 hats.

Saturday, August 20, 2011

Two Paisley Dresses Completed

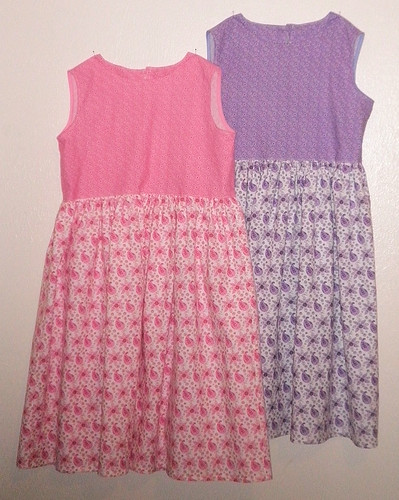
Just completed two more dresses for Anya and Gabriella using Simplicity 2688. Am now going to try to get a few hours sleep before I need to get to JoAnn's to get some more patterns. They're having a sale on Simplicity patterns, 5 for $5, limit 10, and I was able to get 10 I wanted yesterday but still have a few others I'd like to get so I have more variety to make for the girls.

Saturday, August 13, 2011

Another cute little dress done

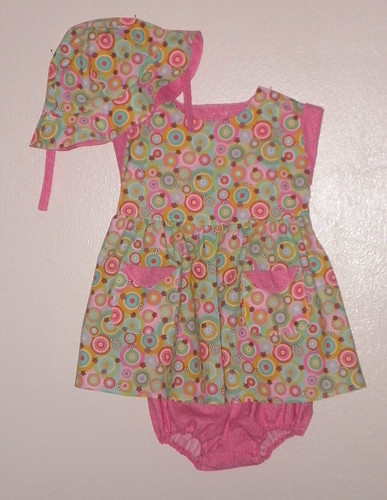
Love the circles on this one! This is the Kwik Sew #3907 again, size 18-24 months. I didn't have enough of one color of buttons so I alternated between pink and green for the back closure. Matches the dress so I think it worked out.


Wanted to get this one done so I can concentrate on the outfits for Marci since the patterns came in yesterday.

Friday, August 12, 2011

And another dress finished

After cutting out the last dress pattern, with Truffles' help, I sewed the bodice and skirt up and attached the skirt to the bodice then had to go to bed as I needed to get to work early the next day. I needed to leave early for a dentist appointment so didn't want to miss too much work as a result.

After the dentist appointment, where I had two teeth extracted, I tried to sew a bit but the pain meds made me dizzy so I took a short nap. After getting up, I finished the dress by sewing the bodice and bodice lining together, top stitching the bodices, and adding the double ruffle.

And here it is, the dress for my little cousin Kasia:


Pattern used: McCall's M5835

I accidentally bought two copies of this pattern (sizes 1, 2, 3, 4), so if anyone (U.S. only) would like it, let me know. Listed price is $11.95 but I got it on sale for $2.99, so I'm willing to let it go for $4.00 (the extra is for shipping).

The patterns I'd ordered for Marcie came in this morning so this weekend will be spent cutting out the pieces and starting to sew them together. Not sure yet if I'll cut out all of them first then sewing them all at once, or cut them out one at a time and sewing together before moving on to the next one. I don't want to make a decision right now until the pain meds wear off a bit though ... :P

Thursday, August 11, 2011

How my cat helps me sew

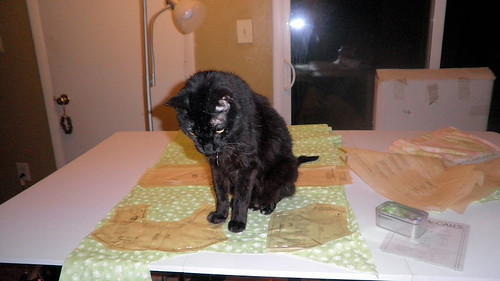
This evening I was cutting out another little dress and, as usual, my cat Truffles decided to help. When he wasn't sitting on the fabric or pattern pieces, he was helping me place pins by nudging my hand to the correct location. Truffles is 19 in people years and the gray hairs have started to show up among the dark chocolate. Truffles has dark chocolate fur with a milk chocolate under coat, which is how he got his name. I've had him since he was four when a co-worker at Boeing needed to find a home for him after he got married and his wife was allergic to cats. Even though I'm also allergic to cats (and dogs), I really needed a cat at the time and agreed to adopt him. Fortunately, God found me the perfect cat as I don't seem to have any problems around him. Get me around just about any other cat and most dogs, and my hands and eyes start itching and swelling, the nose starts running ...

Here is Truffles helping me figure out where to place the pattern pieces:


And here he is taking a short break while trying to figure out why Mr. Darcy was moving around in his bed:


And finally, here he is holding down the fabric so it doesn't slide off the table:


Fortunately, Truffles doesn't mess with my yarns, unlike Mr. Darcy who has been known to chew through projects and yarn balls, especially if they have wool or alpaca in them, and hopelessly tangle recalcitrant skeins.